Building a fiber-optic network is a complex, multi-step process that goes far beyond simply choosing between aerial or underground cables. The construction of a fiber network involves careful planning and design. It requires obtaining permits and rights-of-way. The process includes building the network, either as aerial fiber on poles or underground fiber in trenches. The final step connects the network to individual homes in a fiber to the home (FTTH) model.

All these steps are necessary to bring blazing-fast internet to customers, especially in rural areas, and each step takes time.
Learn everything that goes into building a fiber optic network from start to finish.
Planning & Design: Mapping Out the Fiber Network
Before breaking any ground, engineers undertake an extensive fiber network design and planning phase. This stage involves surveying the area and creating a “roadmap” for the network.
They conduct site surveys (both desk research and field surveys) to assess the feasibility of installing fiber infrastructure. Planners evaluate existing assets like utility poles or conduit. They identify potential obstacles such as highways, rivers, or rocky terrain. They also determine the best routes for the fiber cables.”
During design, engineers decide on the network architecture. They choose between architectures such as a centralized hub-and-spoke design or a Passive Optical Network (PON) with splitters. The choice depends on the fiber to the home strategy and the area’s density.
For example, a typical FTTH design includes a main feeder fiber from the provider’s central office to a neighborhood hub. From there, distribution fibers branch out. Finally, drop fibers connect to each home.
These decisions ensure the network can handle the expected number of users and bandwidth demands. Planning also involves forecasting future needs. This way, the fiber network can be expanded or upgraded later. Upgrades may include adding more fibers or installing higher-capacity equipment without excessive rework.
By the end, the ISP has a detailed network design and construction plan – a blueprint for the fiber build.
Permitting, Easements, and Preparation
With a design in hand, the next step is obtaining all necessary permits and approvals before fiber construction can start. Laying fiber often means working in public rights-of-way (along roads or sidewalks) or sometimes on private property, which requires permission.
ISPs must secure permits from local authorities to dig trenches, close streets, or attach cables to utility poles. In fact, a broadband project typically needs multiple permits and coordination with various agencies.
For example, authorities can require construction plans and diagrams of the fiber route. They review them to ensure compliance with safety and zoning regulations. This permitting stage can be time-consuming – sometimes taking months – and any delays here push back the whole timeline.
Utility easements and right-of-way access are also critical. These established corridors give utility providers the legal right to install and maintain infrastructure without needing to ask individual property owners for permission. This is true even if the easement crosses part of a homeowner’s yard.
In many cases, building in rural areas requires coordination with multiple jurisdictions: county road departments, state transportation agencies for highway crossings, and even federal agencies if the route crosses federal land. Some projects also require environmental and historic preservation reviews.
Preparing the Worksite
During this prep phase, the ISP also plans how to minimize disruption. The project team schedules crews and notifies residents about upcoming work (sometimes via door-hanger flyers or letters). Before digging, they mark existing underground utilities (water, gas, electric, etc.) with colored flags or spray-paint lines. This essential safety step helps prevent fiber installation teams from hitting them. Actual construction begins only after all permits are approved and locates are completed.
Aerial vs. Underground Fiber: Choosing the Deployment Method
One major design decision is whether to deploy aerial fiber (strung on utility poles overhead) or underground fiber(buried in the ground), or a mix of both. Each method has pros and cons, and often the local landscape (rural vs urban, terrain, existing infrastructure) dictates the choice.
Aerial Fiber Network
Aerial fiber keeps upfront costs low and speeds up the construction of a fiber network. However, it has higher maintenance and outage risk due to weather.
Crews can use existing telephone or power poles to hang fiber-optic cables, avoiding the cost of digging trenches. In both rural and urban areas, aerial deployment is a popular, cost-effective option since it uses the pole infrastructure already in place.
This is especially useful in rural regions that have miles of utility poles along roads. However, aerial lines are exposed to the elements. Over time, weather can take a toll; heavy winds, ice storms, or falling tree limbs can damage overhead cables. Cables can sag or break in extreme conditions.
Underground Fiber Network
Underground fiber involves burying the cables, usually inside protective conduit, below ground. This method has a higher upfront cost and is more labor-intensive.
Crews must dig trenches or bore tunnels, which means dealing with whatever lies beneath the surface (rocky soil, water tables, existing utilities). In areas with tough terrain (rock, hills) or lots of tree roots, burying fiber can require specialized equipment and more time.
Once installed, underground fiber stays well protected. Wind or ice can’t easily damage it, making it far more reliable. NoaNet notes underground lines are about 10 times less likely to suffer weather damage compared to aerial routes.
Buried cables also stay out of sight, which some neighborhoods prefer for aesthetics. However, repairing a buried fiber or adding new connections requires digging up the ground again, which can be disruptive and costly.
Fiber Network Construction Usually Use Both
In practice, many fiber network constructions use a mix: burying backbone routes or neighborhood lines for durability, but using aerial drops to houses where possible, or vice versa. Local regulations also play a role. Some cities mandate new telecom lines be underground for appearance, while rural areas may allow aerial on existing poles freely.
Landscape and property layout are big factors in the choice. For instance, in open rural fields with few poles, it might make sense to bury along road edges. In a wooded country road, hanging on poles might avoid constant trenching through tree roots.
Fiber Cable Installation: From Trenches to Utility Poles
Once permits are in place and plans finalized, the physical construction of the fiber network begins. This is the stage where you’ll actually see work crews in your neighborhood building the fiber optic network. The construction methods depend on the chosen deployment (aerial or underground) from the design.
Underground Fiber Installation
For underground fiber installation, crews use machinery like trenchers, plows, or directional boring rigs to open up the ground along the planned route. In many cases, they install an empty plastic conduit (sometimes called innerduct) into the trench first. The fiber-optic cable is later pulled or blown through this conduit, protecting it from moisture and soil, making future repairs or upgrades easier.
If trenching across a lawn or roadside, the cut is often narrow. Some ISPs use techniques like micro-trenching (a small slit in pavement or ground) to minimize the scar. In softer soil, a vibratory plow is used to slice a slit and directly bury a cable or conduit with minimal digging.
In certain cases, especially in established yards or under driveways, crews might use horizontal directional drilling to bore a path underground for the conduit, which avoids having to dig an open trench on the surface.
Throughout this process, safety comes first. Construction teams avoid other utilities marked earlier and dig small holes (potholes) at intersections to confirm they hit no pipes/wires.
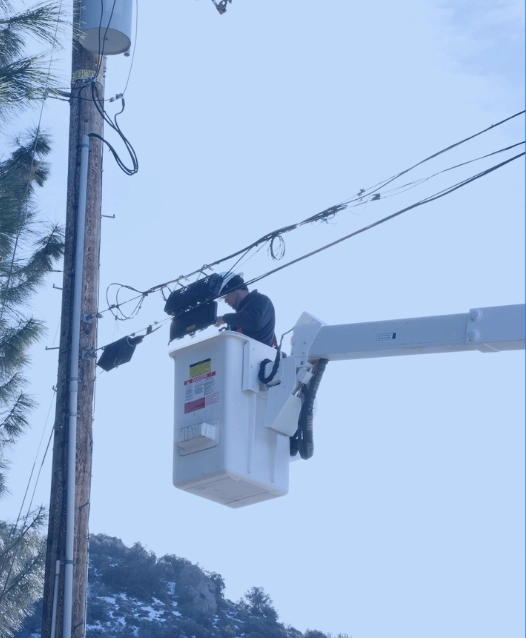
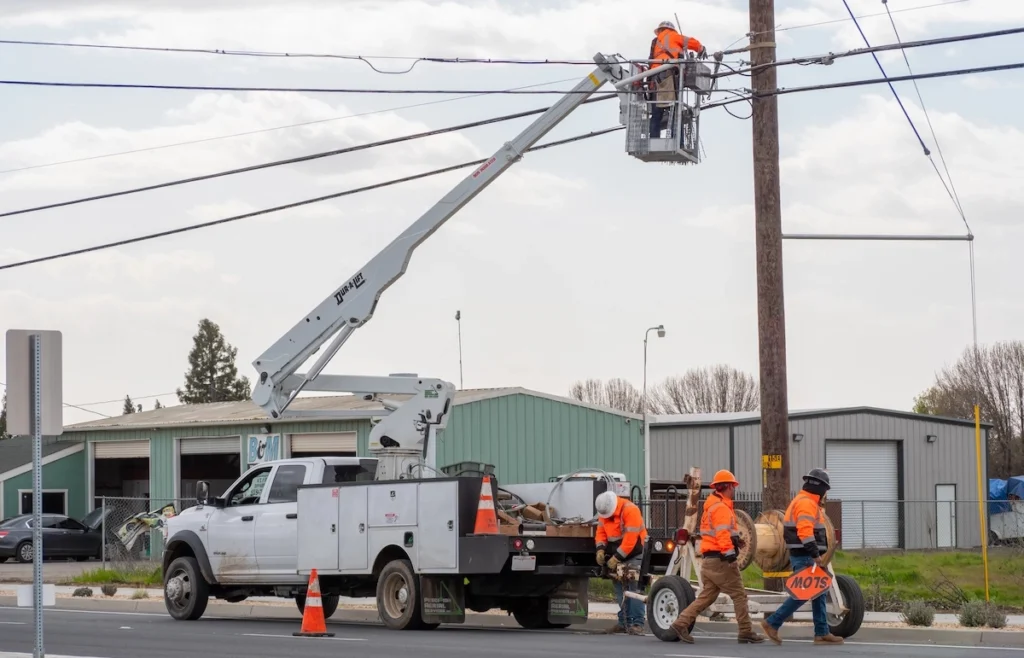
Aerial Fiber Installation
For aerial fiber installation, the process looks a bit different. Bucket trucks or climbers will ride up existing utility poles to lash or hang the fiber cables along the pole line. Fiber installation may involve lashing the cable to a steel messenger wire or using a self-supporting design.
Crews must ensure proper tension and clearance for each span of cable. Aerial installation is generally quicker per mile than trenching. You might see crews string several hundred feet of cable between poles in a short time. They also install distribution terminals or splice enclosures on the poles where needed (for splitting off drops to homes).
Whether buried or aerial, the fiber cable often comes on large reels and is installed in segments. So crews will periodically need to splice segments together, either in underground handholes or on aerial splice points, to create a continuous link.
Managing Disruption During Construction
During the construction phase, there is usually some disruption in the neighborhood. Crews digging trenches create dirt piles or construction fencing. They may partially close roads, dig up lawns, or temporarily block streets with equipment.
Good contractors try to minimize this. For example, by using smaller, targeted digging methods and working section by section. But unfortunately, some mess is unavoidable.
Splicing and Testing the Fiber Network
After crews place the fiber optic cables, they move on to the next critical steps: splicing and testing.
Fiber optic cables don’t come in one infinite length. They are installed in sections that must be joined, and they often have branching points for different neighborhoods or streets.
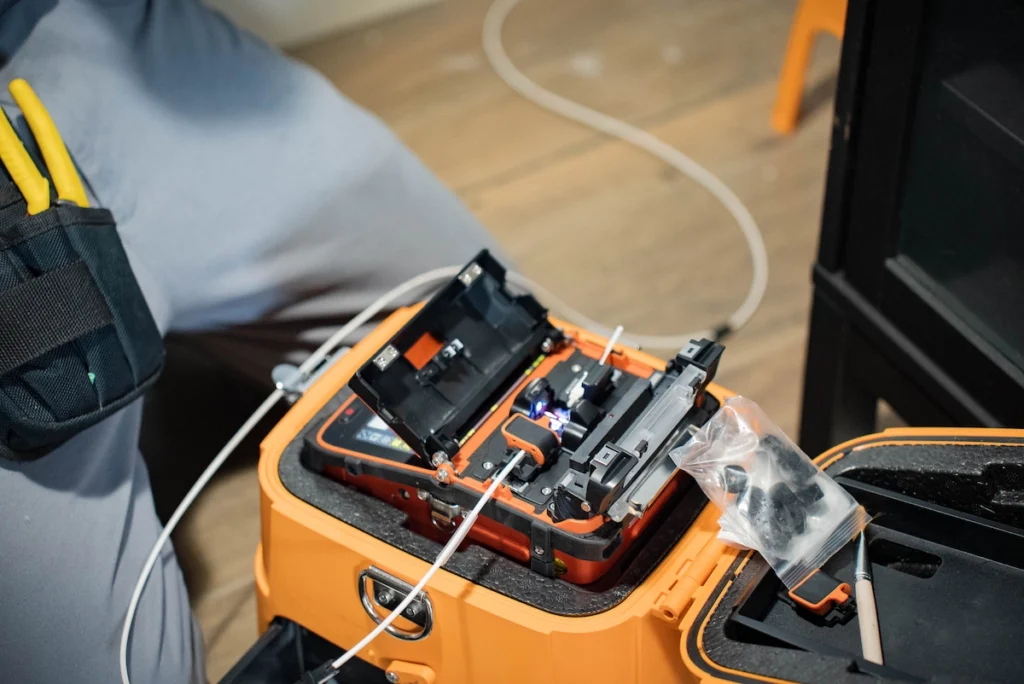
Splicing is the process of fusing two fiber optic strands together so that data can flow seamlessly through them. This is delicate work. Highly trained technicians use specialized equipment (like fusion splicers) to align the microscopic glass cores of each fiber and weld them together with an electric arc.
A single network might involve hundreds of fiber splices (for main lines, branches, repairs, etc.). Each splice must be done with precision. Any dust or slight misalignment can degrade the signal. These splices are typically housed in protective enclosures (often in above-ground cabinets, pole-mounted cases, or underground handhole boxes) to keep them secure from moisture and tension.
Once splicing is completed, the entire fiber route undergoes testing and quality assurance before customers are connected. Technicians use devices like optical time-domain reflectometers (OTDRs) to shoot light pulses down the fiber and measure attenuation, checking for any signal issues or breaks. They verify that each segment and splice meets industry standards and that the network can carry the intended high speeds.
In this testing phase, any problems are addressed (for instance, re-splicing a fiber if the loss is too high). Thorough testing ensures that when the network is finally “lit up” with live traffic, it will deliver gigabit speeds reliably without frequent dropouts. Providers consider the fiber infrastructure ready for customer use only after they fully inspect and certify it.
This rigorous approach is why even after cables are in the ground, there might be a few weeks of behind-the-scenes work before your area’s network is activated. The ISP is making sure everything is working flawlessly.
Connecting the Last Mile: Fiber to the Home (FTTH)
The ultimate goal of all this construction is to enable fiber to the home connections for customers. The “last mile” refers to the final leg of the network that actually reaches your residence.
After technicians test and activate the main fiber lines in a neighborhood, the ISP starts hooking up individual homes. Crews typically run a drop cable from the nearest distribution point (which could be a small pole-mounted terminal, an outdoor vault, or a neighborhood fiber hub) to the customer’s house.
How We Install Fiber Drops
In a rural setting, this might mean a dedicated fiber drop from a pole on the road, across a stretch of property, to the home. In a suburban subdivision, it might mean pulling a fiber drop from a pedestal box at the property line up to the house.
- For underground drops, installers often use a small trencher or even a manual spade to bury the drop cable a short distance (often 6–12 inches deep) across the yard. Some providers use a blade to slit the lawn and push the cable in, creating only a narrow seam that heals quickly.
- For aerial drops, the fiber drop can run from a pole directly to the home’s exterior (similar to how a telephone line or cable line might drop). Installers will attach the drop cable neatly along the side of the house.
Where the Fiber Connects at Your Home
The final connection point is a small box on the outside (or sometimes inside) of the house called an ONT (Optical Network Terminal) or NID (Network Interface Device). This is where the fiber terminates and the optical signal converts to an Ethernet connection for the home.
Installers typically mount the ONT near other utilities (for instance, next to the electric meter or existing phone line entry). From the ONT, they connect the homeowner’s router or interior wiring to deliver internet service throughout the home.
What to Expect During Fiber Optic Installation
When a technician comes to do a fiber optic installation, they will mount the ONT, connect the fiber drop to it, and then test the signal levels. Often, they also set up the customer’s router and ensure that the fiber service is working properly at the customer’s devices.
Not every home in a newly built network area is connected at once. ISPs may run the main network past all homes, but only install the final drop and ONT when each customer orders service. This is common to avoid wasting resources on homes that may not subscribe immediately.
So if fiber construction has finished on your street, you might see technicians doing individual installations at different times as neighbors sign up.
Connecting each home is usually a quick process (perhaps a couple of hours), once the infrastructure in the street is there and ready. When your home gets connected, you’ll soon enjoy the benefits of fiber – like gigabit-speed downloads and ultra-low latency.
What Can Slow Down Fiber Construction (and What We Do About It)
Constructing a fiber network is not without challenges. Customers in rural areas often ask why it takes so long to get fiber and why crews disturb their yards during the process.
Here are some common challenges and how responsible ISPs mitigate them.
Permitting Delays
Acquiring permits from various agencies can be slow. Unexpected holdups (longer review times, additional requirements from the city, etc.) can push back the schedule.
ISPs try to anticipate this by filing permit applications early and maintaining good communication with local officials. Some areas are streamlining broadband permits to speed up approvals. Nevertheless, permit timelines are often outside the ISP’s direct control, so patience is sometimes necessary.
Weather and Terrain
Weather can affect construction pace – heavy rain can turn excavation sites to mud, and winter cold can freeze the ground making trenching difficult. Rural terrain can present extra obstacles like rocky ground or remote locations that are hard to access with equipment.
Companies schedule construction seasons carefully, often doing as much as possible in spring through fall. They use specialized equipment (rock trenchers, directional drills) for tough soil. In winter, if drops can’t be buried due to frozen ground, they might lay temporary above-ground lines and come back to bury them in spring.
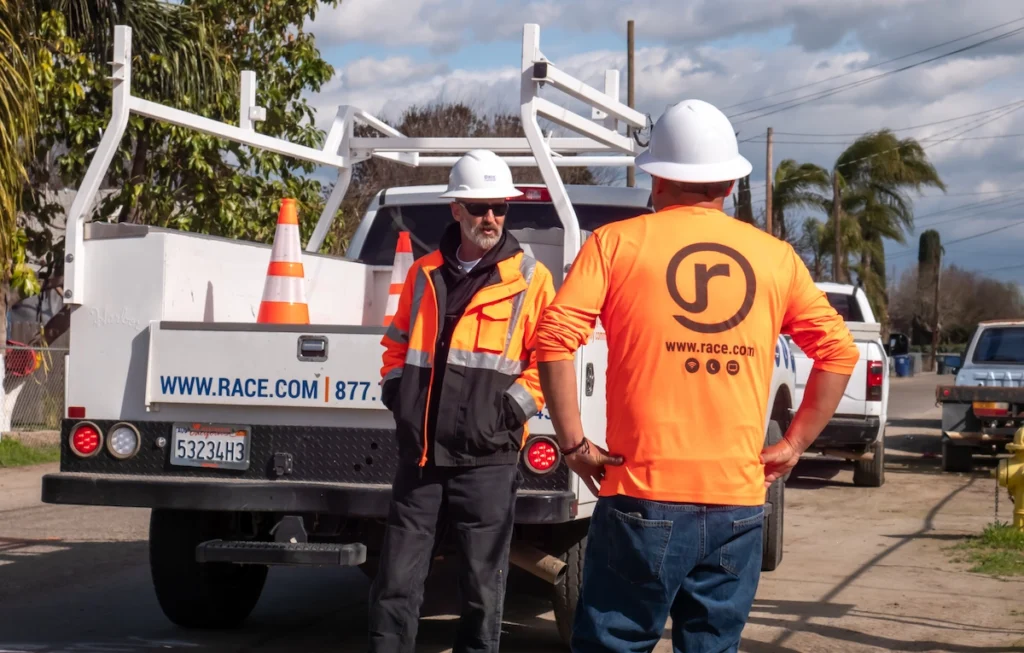
Coordination of Teams
Building a fiber network involves multiple teams – surveyors, construction crews, splicing technicians, and installers – often working in sequence. If one team is delayed (say, the splicers take longer), it can keep the next team (customer installers) waiting, which sometimes frustrates residents who see fiber is in the ground but can’t get service yet.
Good project management and “staging” of work can minimize idle gaps. Some ISPs stagger the work so that as soon as testing is done, they begin customer installations in that zone. Still, there may be a gap between mainline construction finish and service availability, as the final testing and provisioning are completed.
Property Disruption
Digging in yards or along streets inevitably causes temporary mess and sometimes minor damage. Homeowners worry if their lawns, driveways, or landscaping will be restored.
Quality contractors make restoration a formal part of the project. For example, if a lawn is disturbed, they will fill trenches back in, replace the topsoil, and re-seed grass. They may put down straw or erosion blankets to protect new grass seed. If sprinklers or invisible dog fences are accidentally cut (which can happen despite precautions), crews will repair them – many ISPs mention fixing those same day if they know the location.
Cost and Distance in Rural Areas
Reaching far-flung rural homes with fiber is expensive and can be slow going (miles of fiber per few subscribers). Sometimes projects wait on additional funding or materials (fiber cable, poles, electronics) which can introduce delays.
Government grants and programs are helping ISPs close the business case to serve rural areas. Where distance is an issue, ISPs may build out core lines first and then extend spurs to smaller pockets of homes gradually. Using aerial fiber on existing rural electric poles is a common strategy to cover long distances faster and at lower cost. Each rural build is a big investment, but the commitment is to get everyone connected eventually, even if it happens in phases.
Why the Wait for the Construction of a Fiber Network Will Be Worth It
The construction of a fiber network is an involved journey. From initial design and permits through weeks (or months) of physical construction, splicing, and testing, all culminating in that moment when the first home gets fiber-optic internet.
It might feel slow from a waiting customer’s perspective, but each step is building a future-proof infrastructure that can serve the community for decades.
This comprehensive process is why fiber internet is often hailed as the gold standard: the network, once built, offers enormous capacity and reliability (plus, fiber to the home can greatly boost your property’s internet speeds and value)
At Race Communications, we understand the frustrations that can come with the wait and any disturbances during construction. However, we want to assure you that every cut trench and every permit filed is part of a careful plan to deliver world-class broadband to your neighborhood.
By investing time and effort in proper construction now, we ensure that you’ll enjoy gigabit-speed, low-latency connectivity without bottlenecks. In the end, the grass will regrow, the roads will be smooth again, and what will remain is a cutting-edge fiber network ready to power your online life.
Building a fiber-optic network right is a complex task, but it’s how we bring our customers the fastest, most reliable internet – and we’re committed to doing it the right way, every step of the process.